

Have you ever wondered how to start your journey in the world of cryptocurrencies? If so, you might have heard about MetaMask, a popular digital wallet that allows you to interact with the Ethereum blockchain and other networks. In this tutorial, we’ll walk you through the process of setting up your very own MetaMask wallet. By the end, you’ll be ready to send, receive, and manage your cryptocurrencies with ease!
What is MetaMask?
MetaMask is a cryptocurrency wallet that enables you to store, send, and receive Ethereum and other tokens built on the Ethereum blockchain. It also allows you to connect with decentralized applications (dApps) directly from your browser. With its user-friendly interface, MetaMask is perfect for both beginners and experienced users. Analysis of the Best Cryptocurrency Wallets.
Why Use MetaMask?
- User-Friendly: Easy to navigate, even for those new to crypto.
- Security: Your private keys are stored locally on your device, giving you full control over your funds.
- Compatibility: Works with various dApps and platforms, making it versatile for different uses.
Getting Started: Downloading MetaMask
Step 1: Choose Your Platform
MetaMask is available as a browser extension and as a mobile app. You can choose either option depending on your preference:
- Browser Extension: Available for Chrome, Firefox, Brave, and Edge.
- Mobile App: Available for both iOS and Android.
Step 2: Download and Install
For Browser Extension
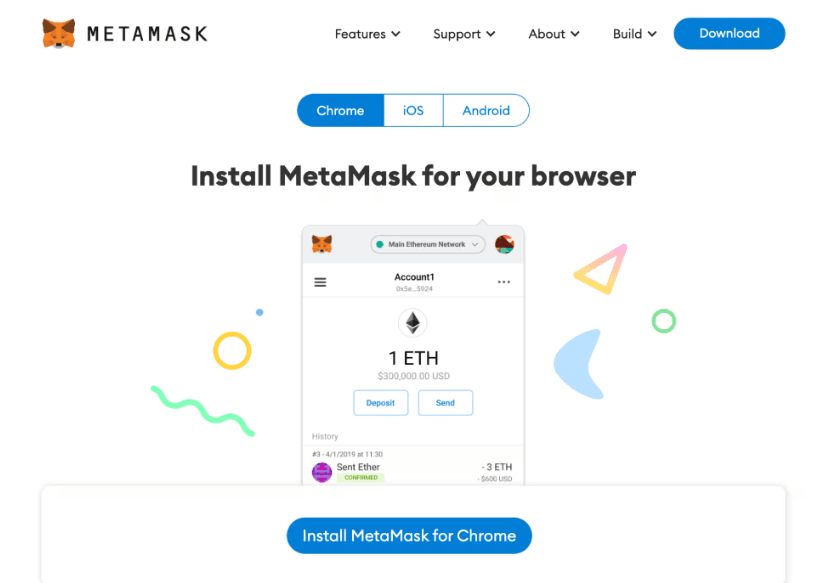
1. Visit the MetaMask website.
2. Click on “Download.”
3. Select your preferred browser and follow the installation instructions.
For Mobile App
1. Open the App Store (iOS) or Google Play Store (Android).
2. Search for "MetaMask."
3. Download and install the app.
Setting Up Your MetaMask Wallet
Step 3: Create a New Wallet
1. Open MetaMask: Launch the extension or mobile app.
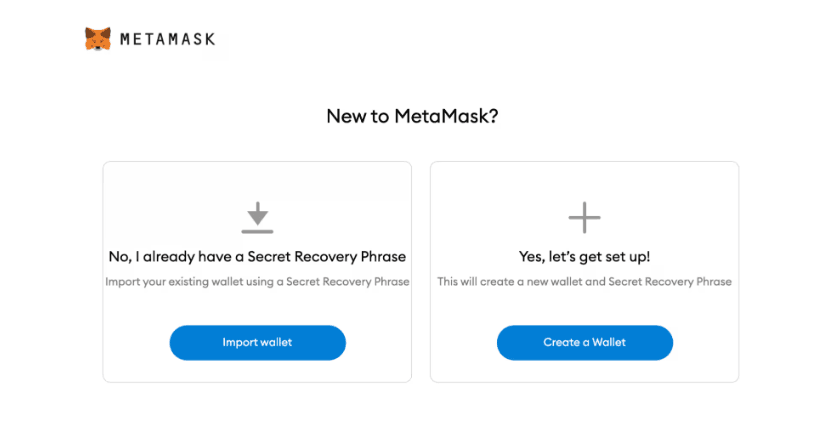
2. Click on "Get Started": You will see an option to create a new wallet or import an existing one.
3. Select "Create a Wallet": Follow the prompts to proceed.
Step 4: Agree to the Terms
Read through the terms of use and privacy policy. Once you’re comfortable, click on “I Agree” to continue.
Step 5: Create a Strong Password
You’ll need to create a password to secure your wallet. Make sure it’s strong and unique. This password will be used every time you access your MetaMask wallet.
Step 6: Backup Your Secret Recovery Phrase
This step is crucial. MetaMask will provide you with a 12-word secret recovery phrase. This phrase is your only way to recover your wallet if you forget your password or lose access to your device.
- Write it down: Keep it in a safe place, away from digital formats.
- Do not share it: Anyone with this phrase can access your wallet.
Step 7: Confirm Your Recovery Phrase
To ensure you’ve written it down correctly, MetaMask will ask you to confirm your recovery phrase. Follow the prompts to complete this step.
Navigating Your MetaMask Wallet
Step 8: Familiarize Yourself with the Interface
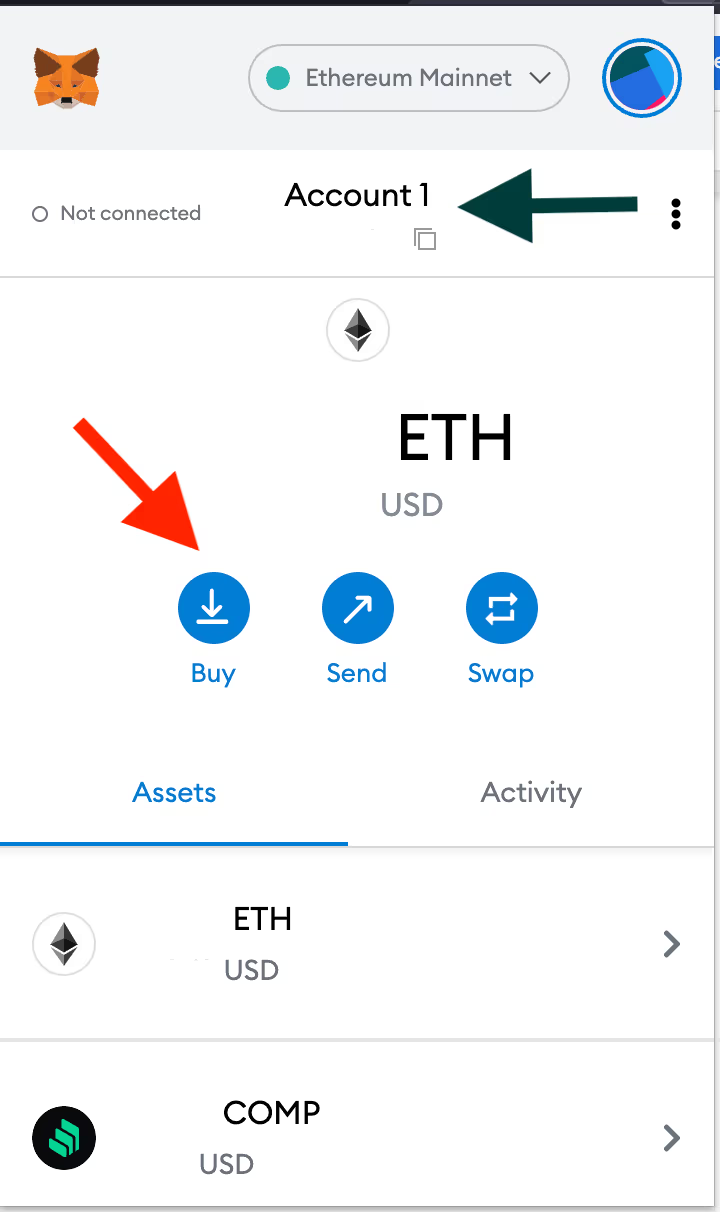
Once your wallet is set up, take a moment to explore the interface:
- Account Overview: View your account balance and transaction history.
- Send and Receive: Easily send or receive Ethereum and tokens.
- Swap: Use the swap feature to exchange tokens within your wallet.
Step 9: Add Custom Tokens
If you have tokens that are not automatically displayed in your wallet, you can add them manually:
1. Click on “Assets” in your wallet.
2. Select “Add Token.”
3. Choose “Custom Token” and enter the token’s contract address, symbol, and decimal.
Using MetaMask
Step 10: Sending Ethereum or Tokens
1. Click on “Send.”
2. Enter the recipient’s wallet address.
3. Specify the amount you want to send.
4. Review the transaction details and click “Next” to confirm.
Step 11: Receiving Ethereum or Tokens
1. Click on “Receive.”
2. Copy your wallet address or use the QR code.
3. Share this information with the sender.
Step 12: Connecting to dApps
MetaMask allows you to connect to various dApps for trading, games, and more:
1. Visit the dApp you want to use.
2. Click on the “Connect Wallet” button.
3. Select MetaMask and follow the prompts to connect.
Security Tips for Using MetaMask
- Enable Two-Factor Authentication (2FA): If available, enable 2FA for added security.
- Regularly Update Your Software: Keep your MetaMask extension or app updated to the latest version.
- Beware of Phishing Attacks: Always double-check URLs and avoid sharing sensitive information.
Troubleshooting Common Issues
Issue 1: Can’t Access My Wallet
If you forget your password, use your secret recovery phrase to restore your wallet.
Issue 2: Transactions Not Going Through
Check your Ethereum network status and ensure you have enough ETH for gas fees.